This is a start Logo for this site and will be change in the future. This site will serve as a logbook of repaired PC's, Laptops, Printers, Power Supplies and "How to" Tutorials.
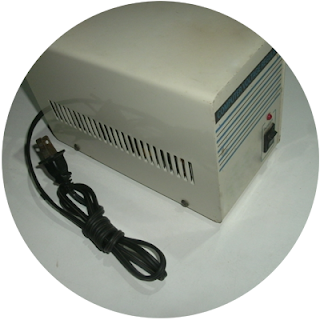
Hi there, today my post is about automatic voltage regulator. What goes into your mind when you hear the term automatic voltage regulator? Yes, its automatically regulate voltage, right? So how this automatic voltage regulator affects our computer? Actually this device does not affect computers directly. This device does not speed up our computer but it protects our computer parts from easily burned during voltage fluctuation. Also it provides step down power for devices from Japan or the US. If we live in Asia and plug this devices, this action could be a disaster to this devices. In Japan and US voltages are in 110volts to 120volts only while in Asia most devices runs in 220volts. So, this AVR is not only for voltage fluctuation but also as step down power. So, what are the most common problems of automatic voltage regulator? I have here the list of problems that we might encounter if we have a defective automatic voltage regulator. 1. Defective Plug Defective plu...
Hello guys, I have today a wiring diagram which I traced the wiring from a cheap headset. Drawn and transferred to a computer to create a .jpeg file. I also, color it so that it will be easier for everyone to analyse the connection. This will help us remember the connection easily if we break the wire unintentionally. Having a wiring diagram connection of plug and wiring will be easier for us. See the headset wiring diagram below. The speakers on the drawing is a symbol and not the real thing as a drawing. Volume and microphone is a real image as a drawing. Only the Left and Right speakers are the symbol on this wiring diagram. You can also identify the location of the left and right speakers in the speaker plug. The mic input in the plug also shows its pin configuration and wiring of the microphone. This will help us locate easily the pin of the speaker in the plug or the mic-in in the mic plug. Last modified: Aug. 31, 2019.
B lank/Black Screen - After 10 minutes of idle your desktop or laptop goes blank screen. Sometimes 5 minutes of idle goes to blank screen. If it is your first time to experience this event happened to your laptop or desktop you might wonder why this event happen. This process called power management it has a default time frame when system is idle on a specific period of time it goes to standby mode or sometimes goes to sleep depending on the settings setup by your computer manufacturer. How many minutes does a laptop or desktop have before it goes to blank screen or standby mode? When you installed Windows 10 on your laptop, Windows 10 sets the time frame for 5 minutes, this setting is for power saver setting. This setting helps protect your battery life to last longer than usual operation. In desktop computer, Windows 10 sets the time frame to 10 minutes because desktop computers rely on AC power and not on battery. Can we change or edit the power settings or optio...


Comments
Post a Comment